
What is a VPN? A VPN is a private, protected path for your internet. When it is on, the websites you open see our server instead of your home or office connection, and other people on the same Wi-Fi cannot read your traffic.
In PFNApp you buy a VPN plan, install the free UniVPN app, and connect your devices. This guide takes about 5 minutes.
Before you start: make sure your organization has enough balance. The balance is at the top right of the console. Click the lightning icon next to it to top up.
Step 1. Choose a plan
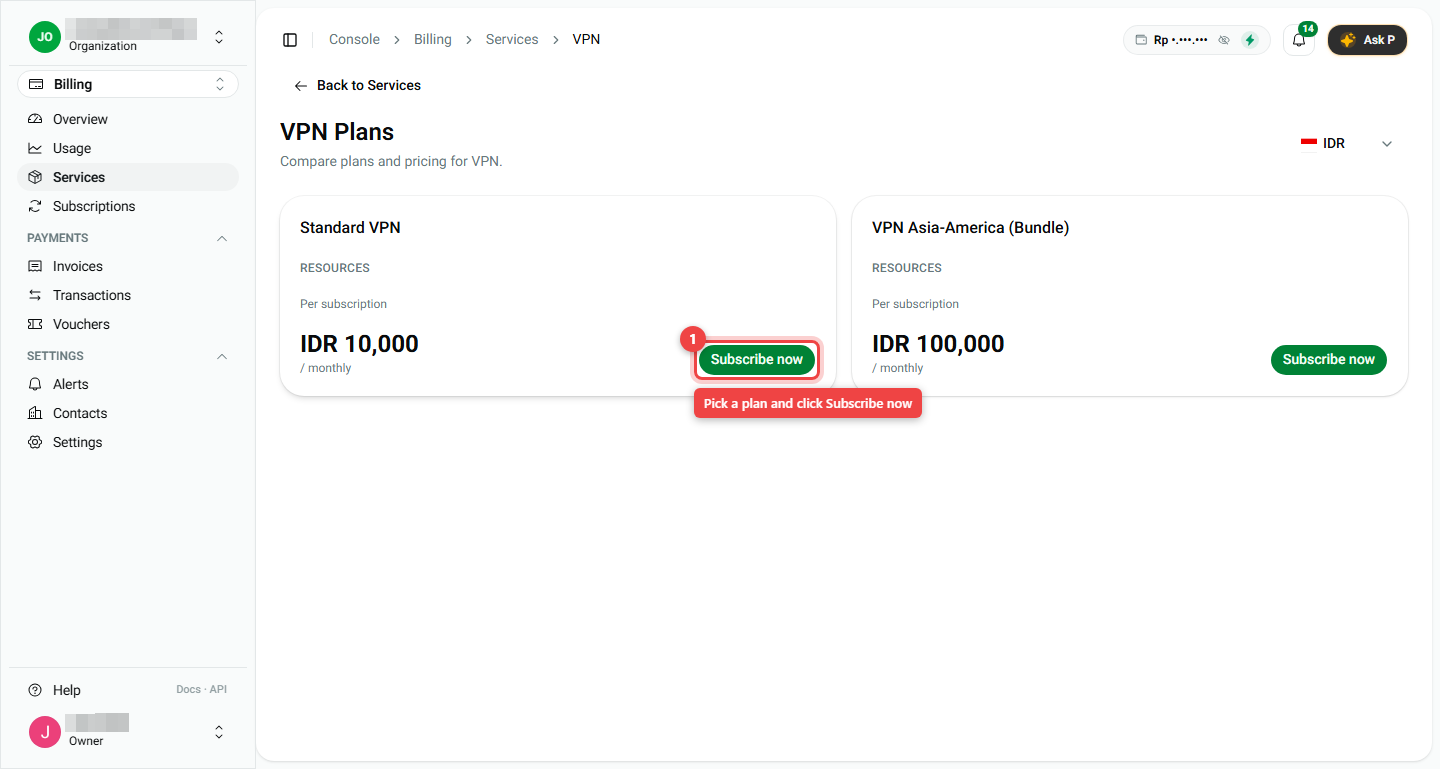
- In the left menu, open VPN, then click Order VPN Plans.
- Compare the plans. Each card shows the price per month.
- Click Subscribe now on the plan you want (number 1 in the picture).
Step 2. Pay on the Checkout page
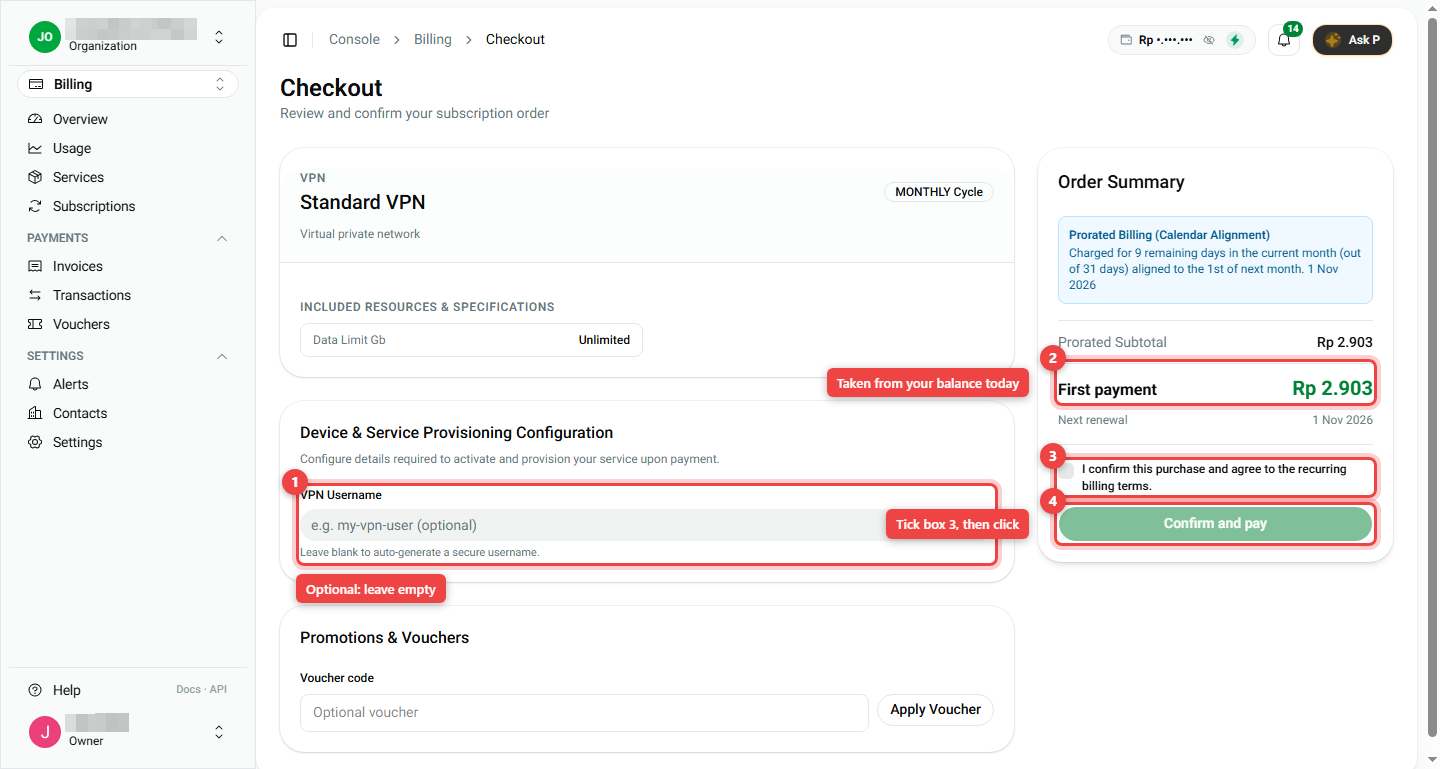
The Checkout page shows what you buy and how much you pay today.
- VPN Username (number 1): you can leave this empty. We make one for you.
- First payment (number 2): this is the amount taken from your balance today. In the first month you only pay for the days left in the month. After that, the plan renews on the 1st of every month.
- Tick the box I confirm this purchase... (number 3).
- Click Confirm and pay (number 4).
Have a voucher code? Type it in Voucher code and click Apply Voucher before you pay.
After paying, the plan appears in VPN > Access Profiles with the status ACTIVE. Setting up the server takes a short moment. If it says Provisioning, wait a minute and refresh.
Step 3. Install the UniVPN app
- In the left menu, click Downloads.
- Pick the button for your device:
- Download APK for an Android phone (number 1).
- Download .exe for a Windows laptop or PC (number 2).
- Download .dmg for a Mac (number 3).
- Open the downloaded file and install it like any other app.
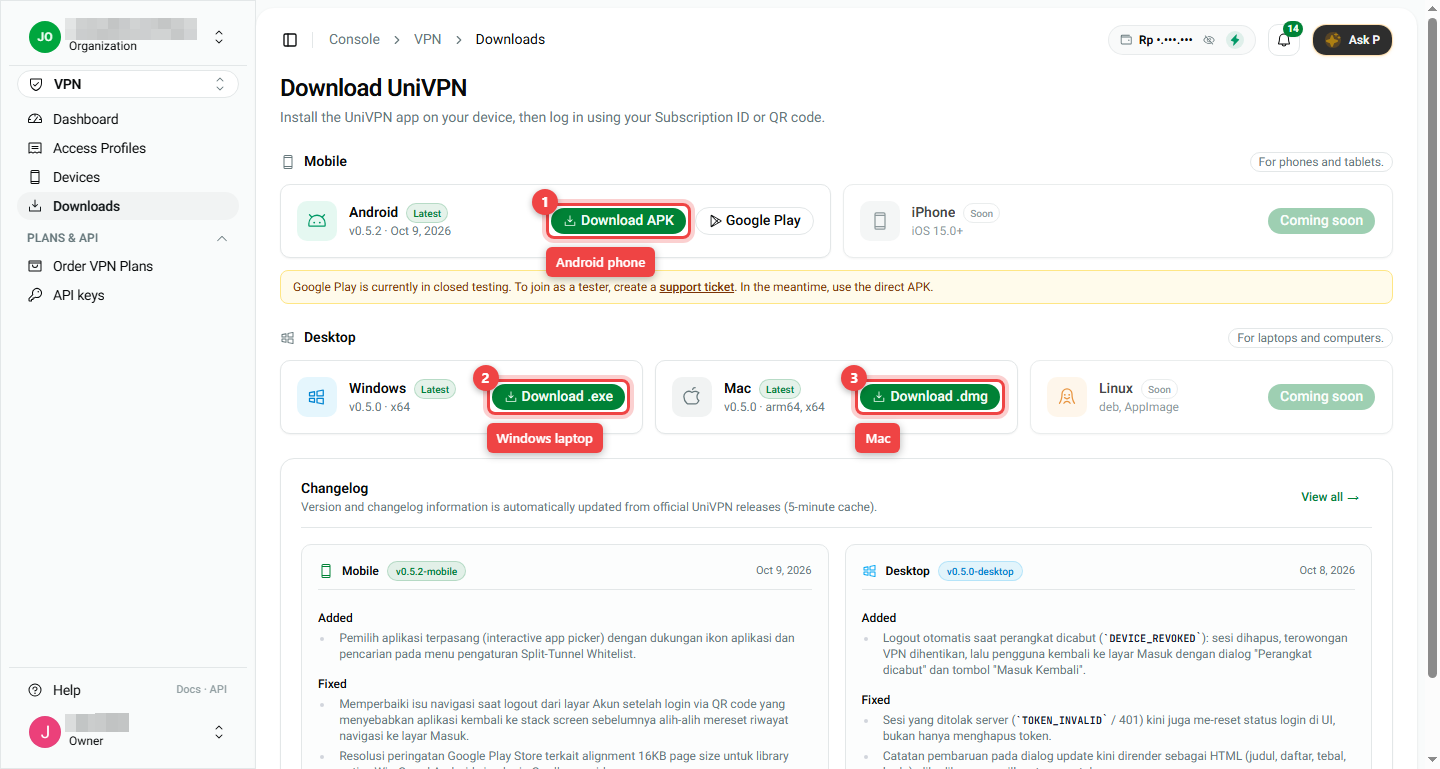
iPhone and Linux versions are coming soon. They show Coming soon for now.
Step 4. Connect your device
- In the left menu, click Devices.
- Click Pair New Device.
- Choose your plan from the list and click Continue.
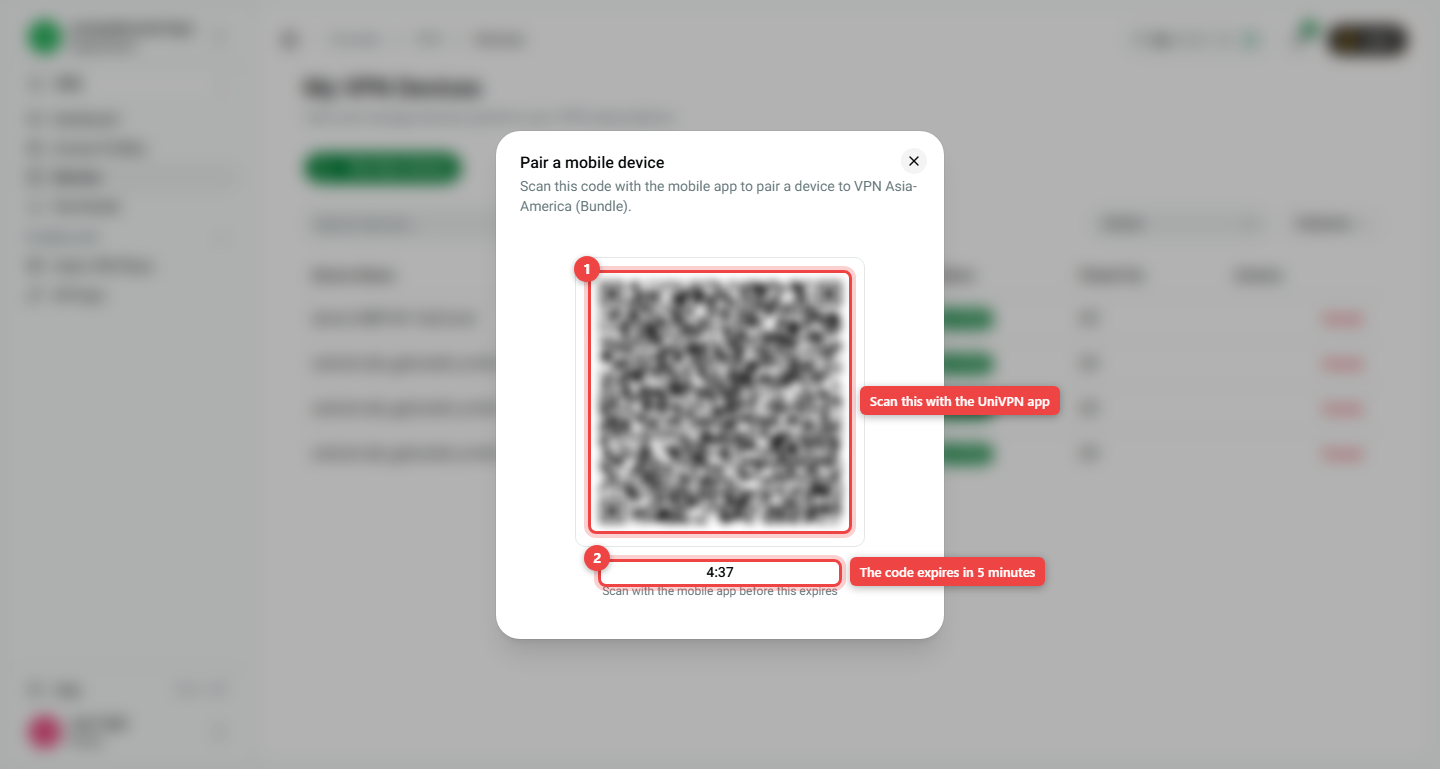
- A QR code appears (number 1). Open the UniVPN app on your phone and scan it.
- Do it before the timer (number 2) reaches zero. The code works for 5 minutes.
When it works, your device shows up in the Devices list with the status ACTIVE. Turn the VPN on in the UniVPN app and you are protected.
On a laptop, you can also sign in to UniVPN with your Subscription ID. It is the code under the plan name in Access Profiles. Click the copy icon next to it.
Check everything on the Dashboard
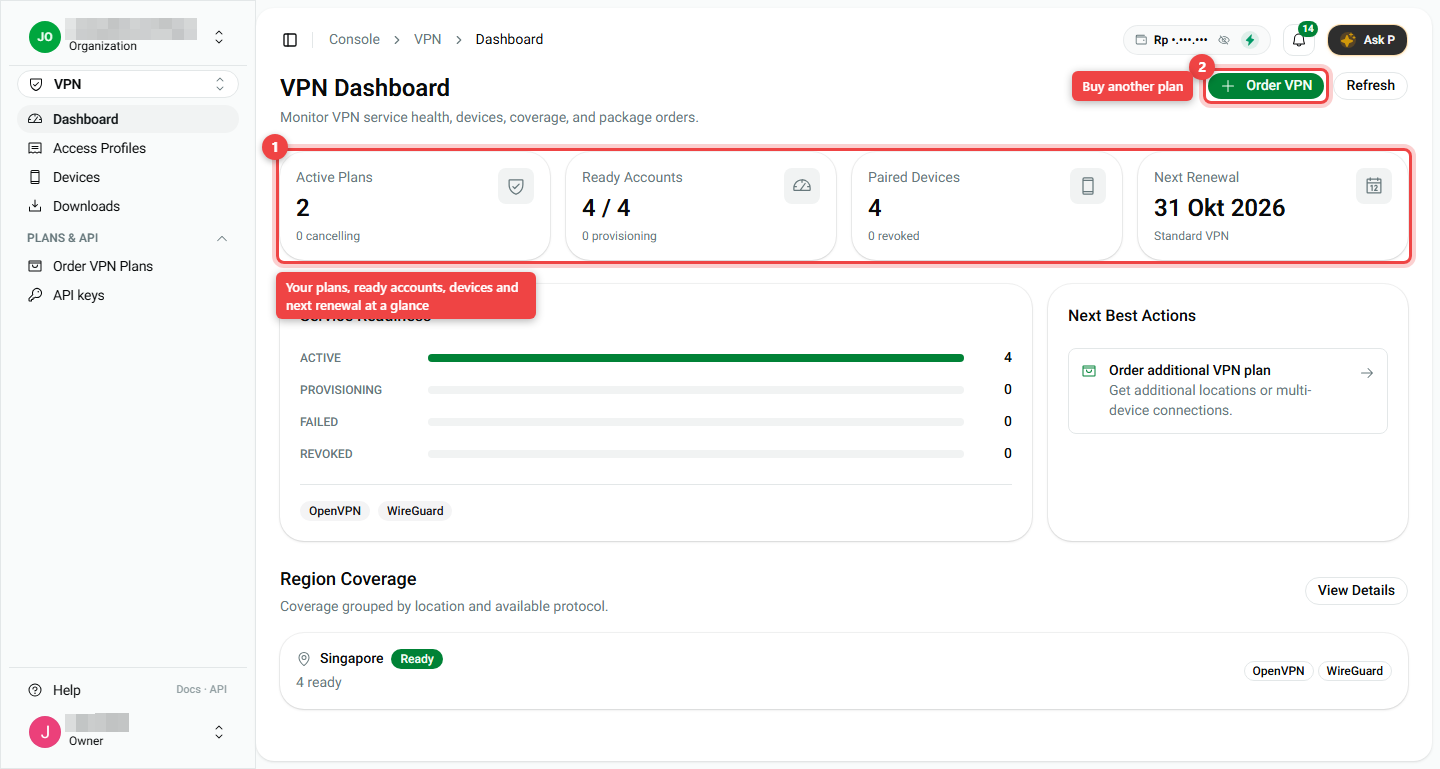
Open VPN > Dashboard at any time to see:
- Active Plans: how many plans you have.
- Ready Accounts: server locations ready to use.
- Paired Devices: how many devices are connected.
- Next Renewal: when your balance is charged again.
Summary
| Step | Where | What you do |
|---|---|---|
| 1 | VPN > Order VPN Plans | Click Subscribe now on a plan |
| 2 | Checkout | Tick the box, click Confirm and pay |
| 3 | VPN > Downloads | Install UniVPN on your device |
| 4 | VPN > Devices | Pair New Device, scan the QR in UniVPN |
- Keep enough balance so the plan can renew on the 1st of each month.
- The QR code is valid for 5 minutes. Make a new one if it expires.
- Next: Connect and manage devices and Manage or cancel your plan.