
A domain is a web address, like shop.yourname.com. Every app already has a free one ending in .sg.pfnapp.dev. You can also connect a domain you own.
Open your app, click the Settings tab, then Domains in the menu on the left.
Words used here
- DNS: the internet's address book. You add a record there so your domain points to your app. You do this where you bought the domain (for example Niagahoster, Cloudflare, GoDaddy).
- SSL / https: the padlock in the browser. We set it up for you, for free.
1. Add your own domain
- In Custom Domain Settings, type your domain, for example
shop.yourname.com. - Click Add Domain.
- The page shows DNS targets: the records to add. Log in to your domain provider and add them exactly as shown.
- Come back and wait. When it works you see:
- DNS: Verified (number 1): your domain points to the app.
- Certificate: SSL Active (number 2): the padlock is ready.
- Not green yet? DNS changes can take a while. Click Verify (number 3) to check again.
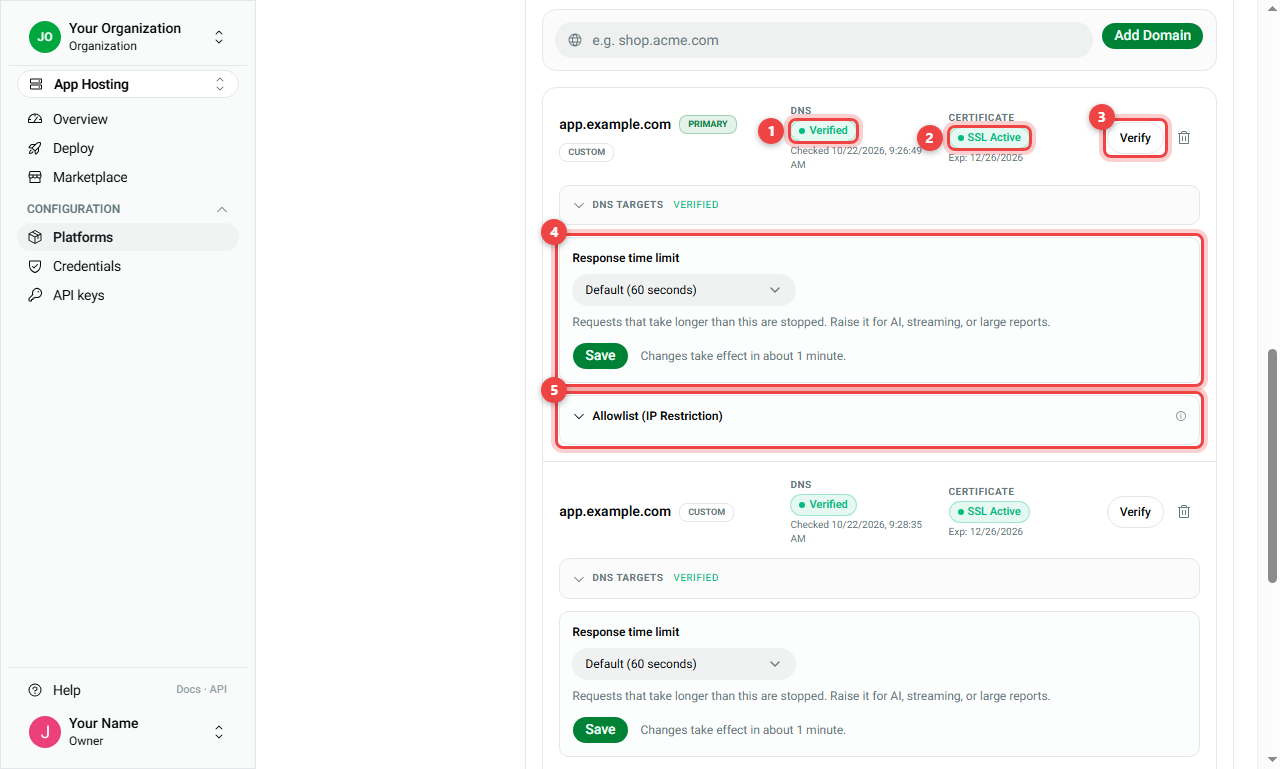
The Primary URL at the bottom is the address visitors use now. The bin icon removes a domain.
Turn the free address off
The free .sg.pfnapp.dev address cannot be deleted, but it can be switched off with its Active switch. Make another domain primary first.
2. Response time limit for one domain
Each domain has a Response time limit (number 4). By default a request may take 60 seconds. If your app does slow work (AI answers, big reports, streaming), choose 2 minutes, 5 minutes, 15 minutes, or Set your own… (10 seconds to 60 minutes), then click Save.
3. Allow only certain IP addresses
Open Allowlist (IP Restriction) (number 5) on a domain to let only listed IP addresses open the app, for example only your office network.
4. Presets for all domains
At the top of the Domains page, Annotations for all domains > Presets switches on common options for every domain of the app:
- Response timeout (number 1): how long to wait for the app to answer, for all domains. A limit set on a single domain wins over this.
- CORS (number 2): lets other websites use your app from the browser. Turn it on only if your developer asks for it. You can set the Allowed origin (which websites may call it).
- Basic auth (number 3): asks every visitor for a username and password before the app opens. Handy to hide an app that is not ready yet.
- + Add annotation (number 4): advanced settings for technical users.
- Add Domain (number 5): connect your own domain (see part 1).
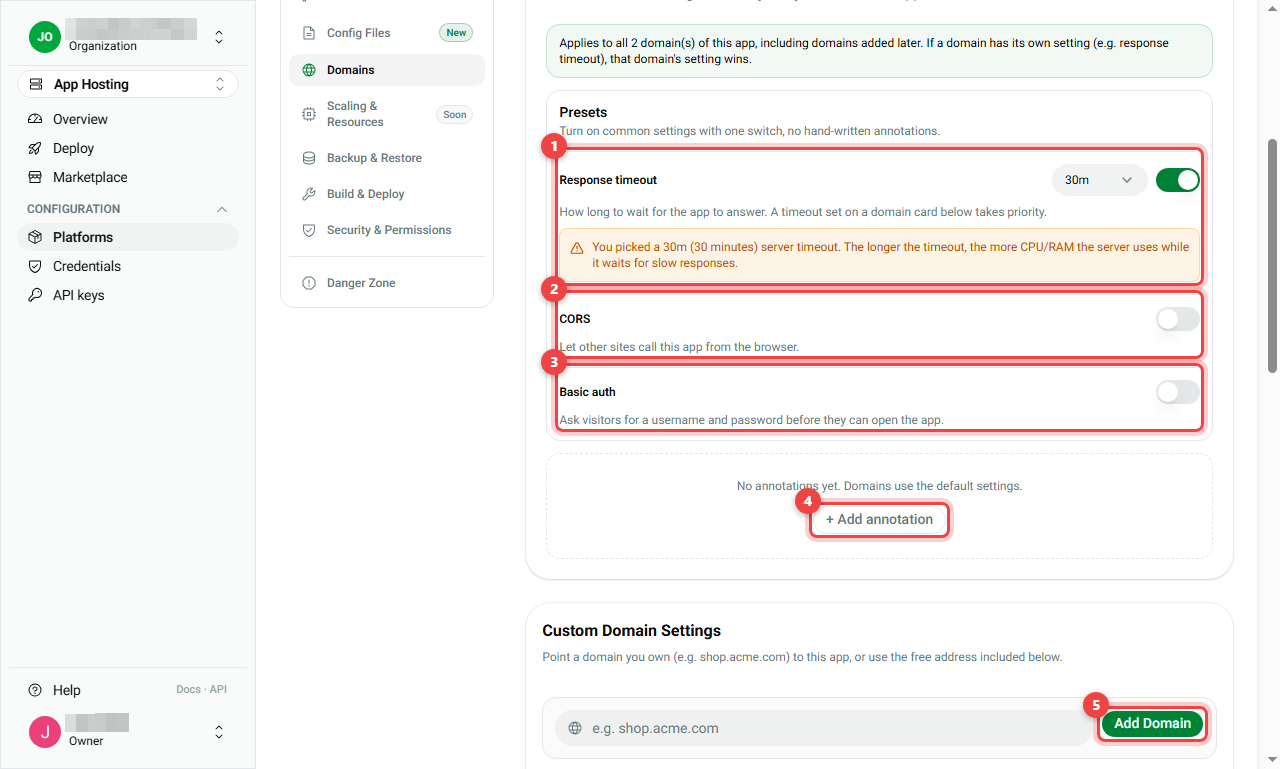
A long timeout makes the server wait longer and use more CPU/RAM. Only raise it if you need to.
Summary
| I want to... | Do this |
|---|---|
| Use my own address | Add Domain, add the DNS records at your provider |
| Check it works | Look for Verified and SSL Active, or click Verify |
| Allow slow pages | Response time limit on the domain, then Save |
| Protect with a password | Presets > Basic auth |
| Limit who can open it | Allowlist (IP Restriction) |
- The free
.sg.pfnapp.devaddress always works and has https. - Changes take about 1 minute.