
App Hosting runs apps on our servers so anyone can open them on the internet. Every app gets its own web address with a padlock (https), plus pages to see logs, usage and settings. You do not need to manage a server.
The easiest start is the Marketplace: ready-made apps you can install in a few clicks.
Words used here
- Deploy: put an app online.
- Template: a ready-made app in the Marketplace.
- Package (plan): the size of the computer your app runs on (CPU, RAM, disk) and its price.
- Region: the country where the server is.
Step 1. Top up your balance
The app is paid from your organization balance, shown at the top right of the console. Click the lightning icon next to it to top up, or open Console > Billing.
Step 2. Pick an app in the Marketplace
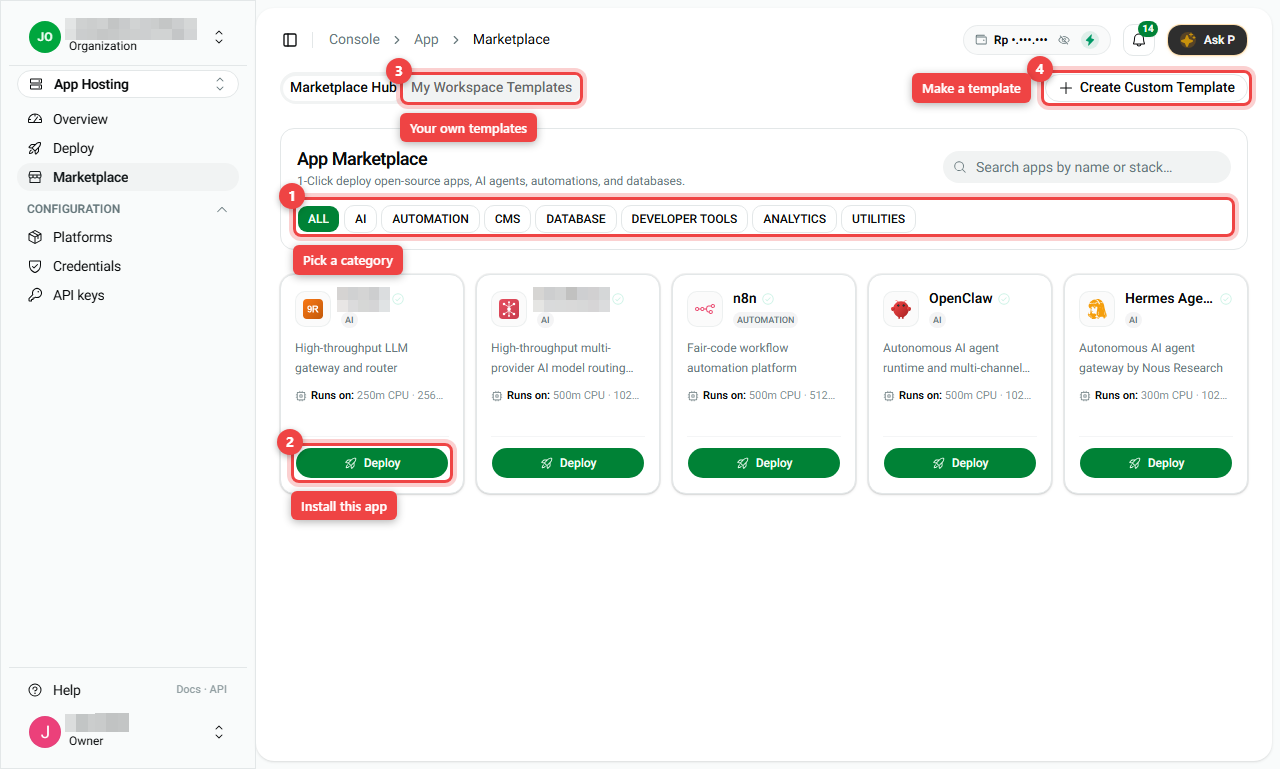
- In the left menu, open App Hosting > Marketplace.
- Use the category buttons (number 1) such as AI, AUTOMATION or CMS, or search by name.
- Click Deploy on the app you want (number 2).
My Workspace Templates (number 3) holds templates your team made, and Create Custom Template (number 4) lets you make one.
Step 3. Fill in the Deploy panel
A panel opens on the right.
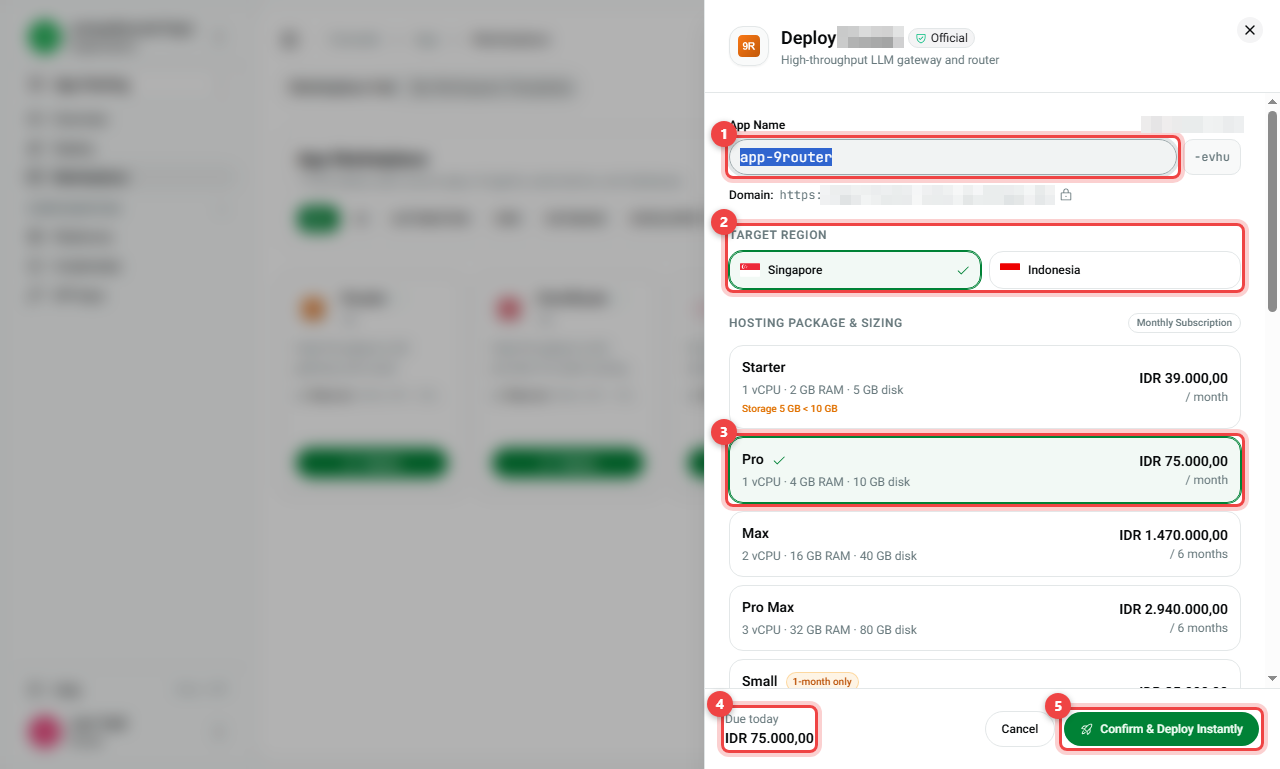
- App Name (number 1): the name of your app. It becomes part of the address, for example
https://app-9router-evhu.sg.pfnapp.dev. - Target Region (number 2): where the server is, for example Singapore or Indonesia.
- Hosting Package (number 3): pick a size. Each card shows CPU, RAM, disk and the price. A tick marks your choice.
- Billing term: Monthly or Annual (about 8% cheaper).
- Environment configuration: the app's settings. Most are filled in for you; just check them.
- Due today (number 4): what you pay now.
- Click Confirm & Deploy Instantly (number 5).
Step 4. Wait, then open your app
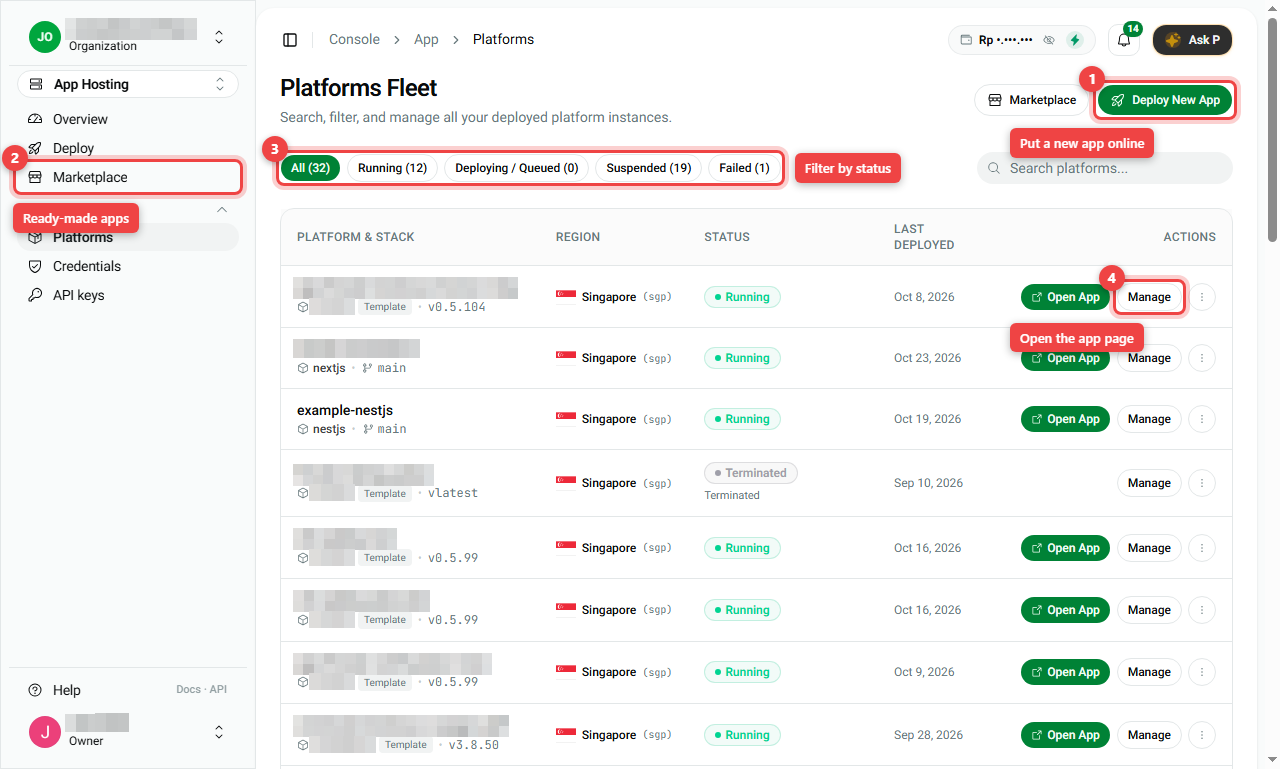
- Open App Hosting > Platforms. Your app is in the list.
- Wait until the status says Running. This usually takes a few minutes.
- Click Open App to visit it, or Manage to open its page.
Summary
| Step | Where | What you do |
|---|---|---|
| 1 | Top right of the console | Top up your balance |
| 2 | App Hosting > Marketplace | Click Deploy on an app |
| 3 | Deploy panel | Name, region, package, then Confirm & Deploy Instantly |
| 4 | App Hosting > Platforms | Wait for Running, then Open App |